Equipment
While we were able to make this show “on the cheap,” it still does take money to get started.
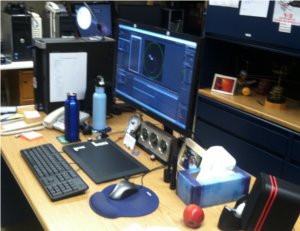 The central component is a REALLY good computer. I will not get into the battle that is Mac vs. PC (and throw in the rebel LINUX faction, too). Since I have been using Windows/ PC machines for most of my career that is what I’m the most comfortable with. No comment regarding the superiority of one over the other. Thanks to the NSF grant that funded the show, I was able to get a GREAT graphics machine. You will need AS MUCH RAM as you possibly can afford (this machine has 32GB.) I also got 2TB of storage, plus another 2TB on a plug in drive. That’s important, because your dome masters will take up a lot of room. Lastly, the best graphics card your machine can support is critical, too. Not as critical are some helpful accessories: A 30” monitor, really good speakers, as many USB 3.0 ports as you can get, and a great set of headphones have all been used a bunch. The machine cost us around $5000.
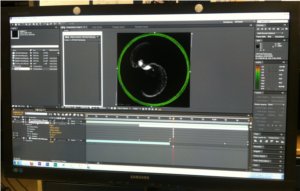 The show was built and rendered using the Adobe CS5 Suite, which was upgraded to CS6 about halfway through the production. This is your other huge hunk of the production budget. AfterEffects is the backbone that I used to animate and render the show. I started with some great video tutorials from CreativeCow.net, and then my learning curve grew exponentially the more I used it. It helped that I was already a Photoshop Jedi, so I knew the basic way Adobe set up their programs. Photoshop was also a huge help in manipulating images before adding them to AfterEffects. Those of you who like Illustrator will find it invaluable as well – I find that my experience with Photoshop allows me to make stuff better than in Illustrator. That might be different if I played around with Illustrator more, however. Our soundtrack was created using Soundbooth in CS5, which has been replaced by Audition in CS6. Lastly, PremierePro and the Adobe Encoder can be used to produce the final video to run on your system, however we have had fair to good results rendering straight from AfterEffects.
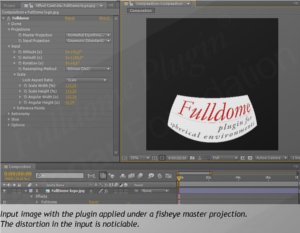 Another small but incredibly useful expense is the Fulldome plugin for AfterEffects from the Navegar Foundation, based in Portugal. U.S. folks can get it from Matt Mascheri at www.Dome3D.com. This product will warp your images so they look right on your dome, both keystoning a rectangular image and spreading something over the whole dome, it is a great timesaver (however it is one of the reasons you’ll need that extra RAM.)
Last, but certainly not least, is a FREE open source program called Blender. I will not detail it here, but Blender is a cumbersome but powerful tool for creating 3D video models from scratch. Annie Wilson will detail this at great length in her blog post.
In the next part of this series, Curt will talk about the general outline for a planetarium show.
Science on the Half Sphere’s first full-length planetarium show is Cosmic Castaways. In this series of posts, we will talk about how the show was made. The goal is to help other people interested in making full-dome planetarium shows see what we did, and hopefully avoid our mistakes! This set of posts is authored by Curt Spivey.
No comments yet.