
Got a question? We just might have an answer for you below.
We are working to collect the most frequently asked questions from the forum, blog comments, and your emails all in one place so it is easier for you to find answers and see what others are wondering about.
- Why am I identifying craters?
- What is CosmoQuest Planet Mappers currently studying?
- I think I’ve found something weird or interesting. What do I do?
- How do I know if I’m doing anything right? Why can’t I go back and change things?
- I don’t see any craters, all I see are hills.
- The image is cut off!
Why am I identifying craters?
Craters can tell planetary scientists a lot about a surface, such as its age, what kinds of erosion processes may have occurred, and what kind of material may be just under the surface.
To study all these things, we need to know where impact craters are, how many there are, and different things about them. This gives us the basic task of CosmoQuest Planet Mappers: Find craters!
What is CosmoQuest Planet Mappers currently studying?
MercuryMappers is launching with the primary goal to create a global crater database that will inform a variety of studies.
One of the first things we want to study is the population of secondary craters. When an impactor (comet or asteroid) strikes the surface of a planet, blocks of ejecta are thrown from the resulting crater. This ejecta material can then re-impact the surface, forming secondary craters. Studies have shown previously that on Mars, secondary craters will start to dominate the population for craters smaller than 1 km across. On the Moon, some have suggested that this starts for craters smaller than 3 km across.
Some preliminary studies based on MESSENGER images of Mercury show that secondary craters may start to dominate the crater population for craters smaller than 10 km across. The current thinking as to why this may be is that objects that make craters on Mercury travel over 2x as fast as they do near Earth, this generates high velocity (so high energy) ejecta, and Mercury’s larger gravity relative to the Moon means that these ejecta blocks won’t escape – they’ll fall back and make more craters. So while there is a theoretical reason for why Mercury would have a larger secondary crater population, extensive work needs to be done to verify it and determine the true amount of contamination.
The public is full of talented people with interest in science and both the time and skills needed to help us learn more about our solar system. And it’s way more fun when we all work together. Not only that, but in the process, we hope the public can not only enjoy the return from the mission, but also get a real feel for how science is done and what it is like to be a scientist.
I think I’ve found something weird or interesting. What do I do?
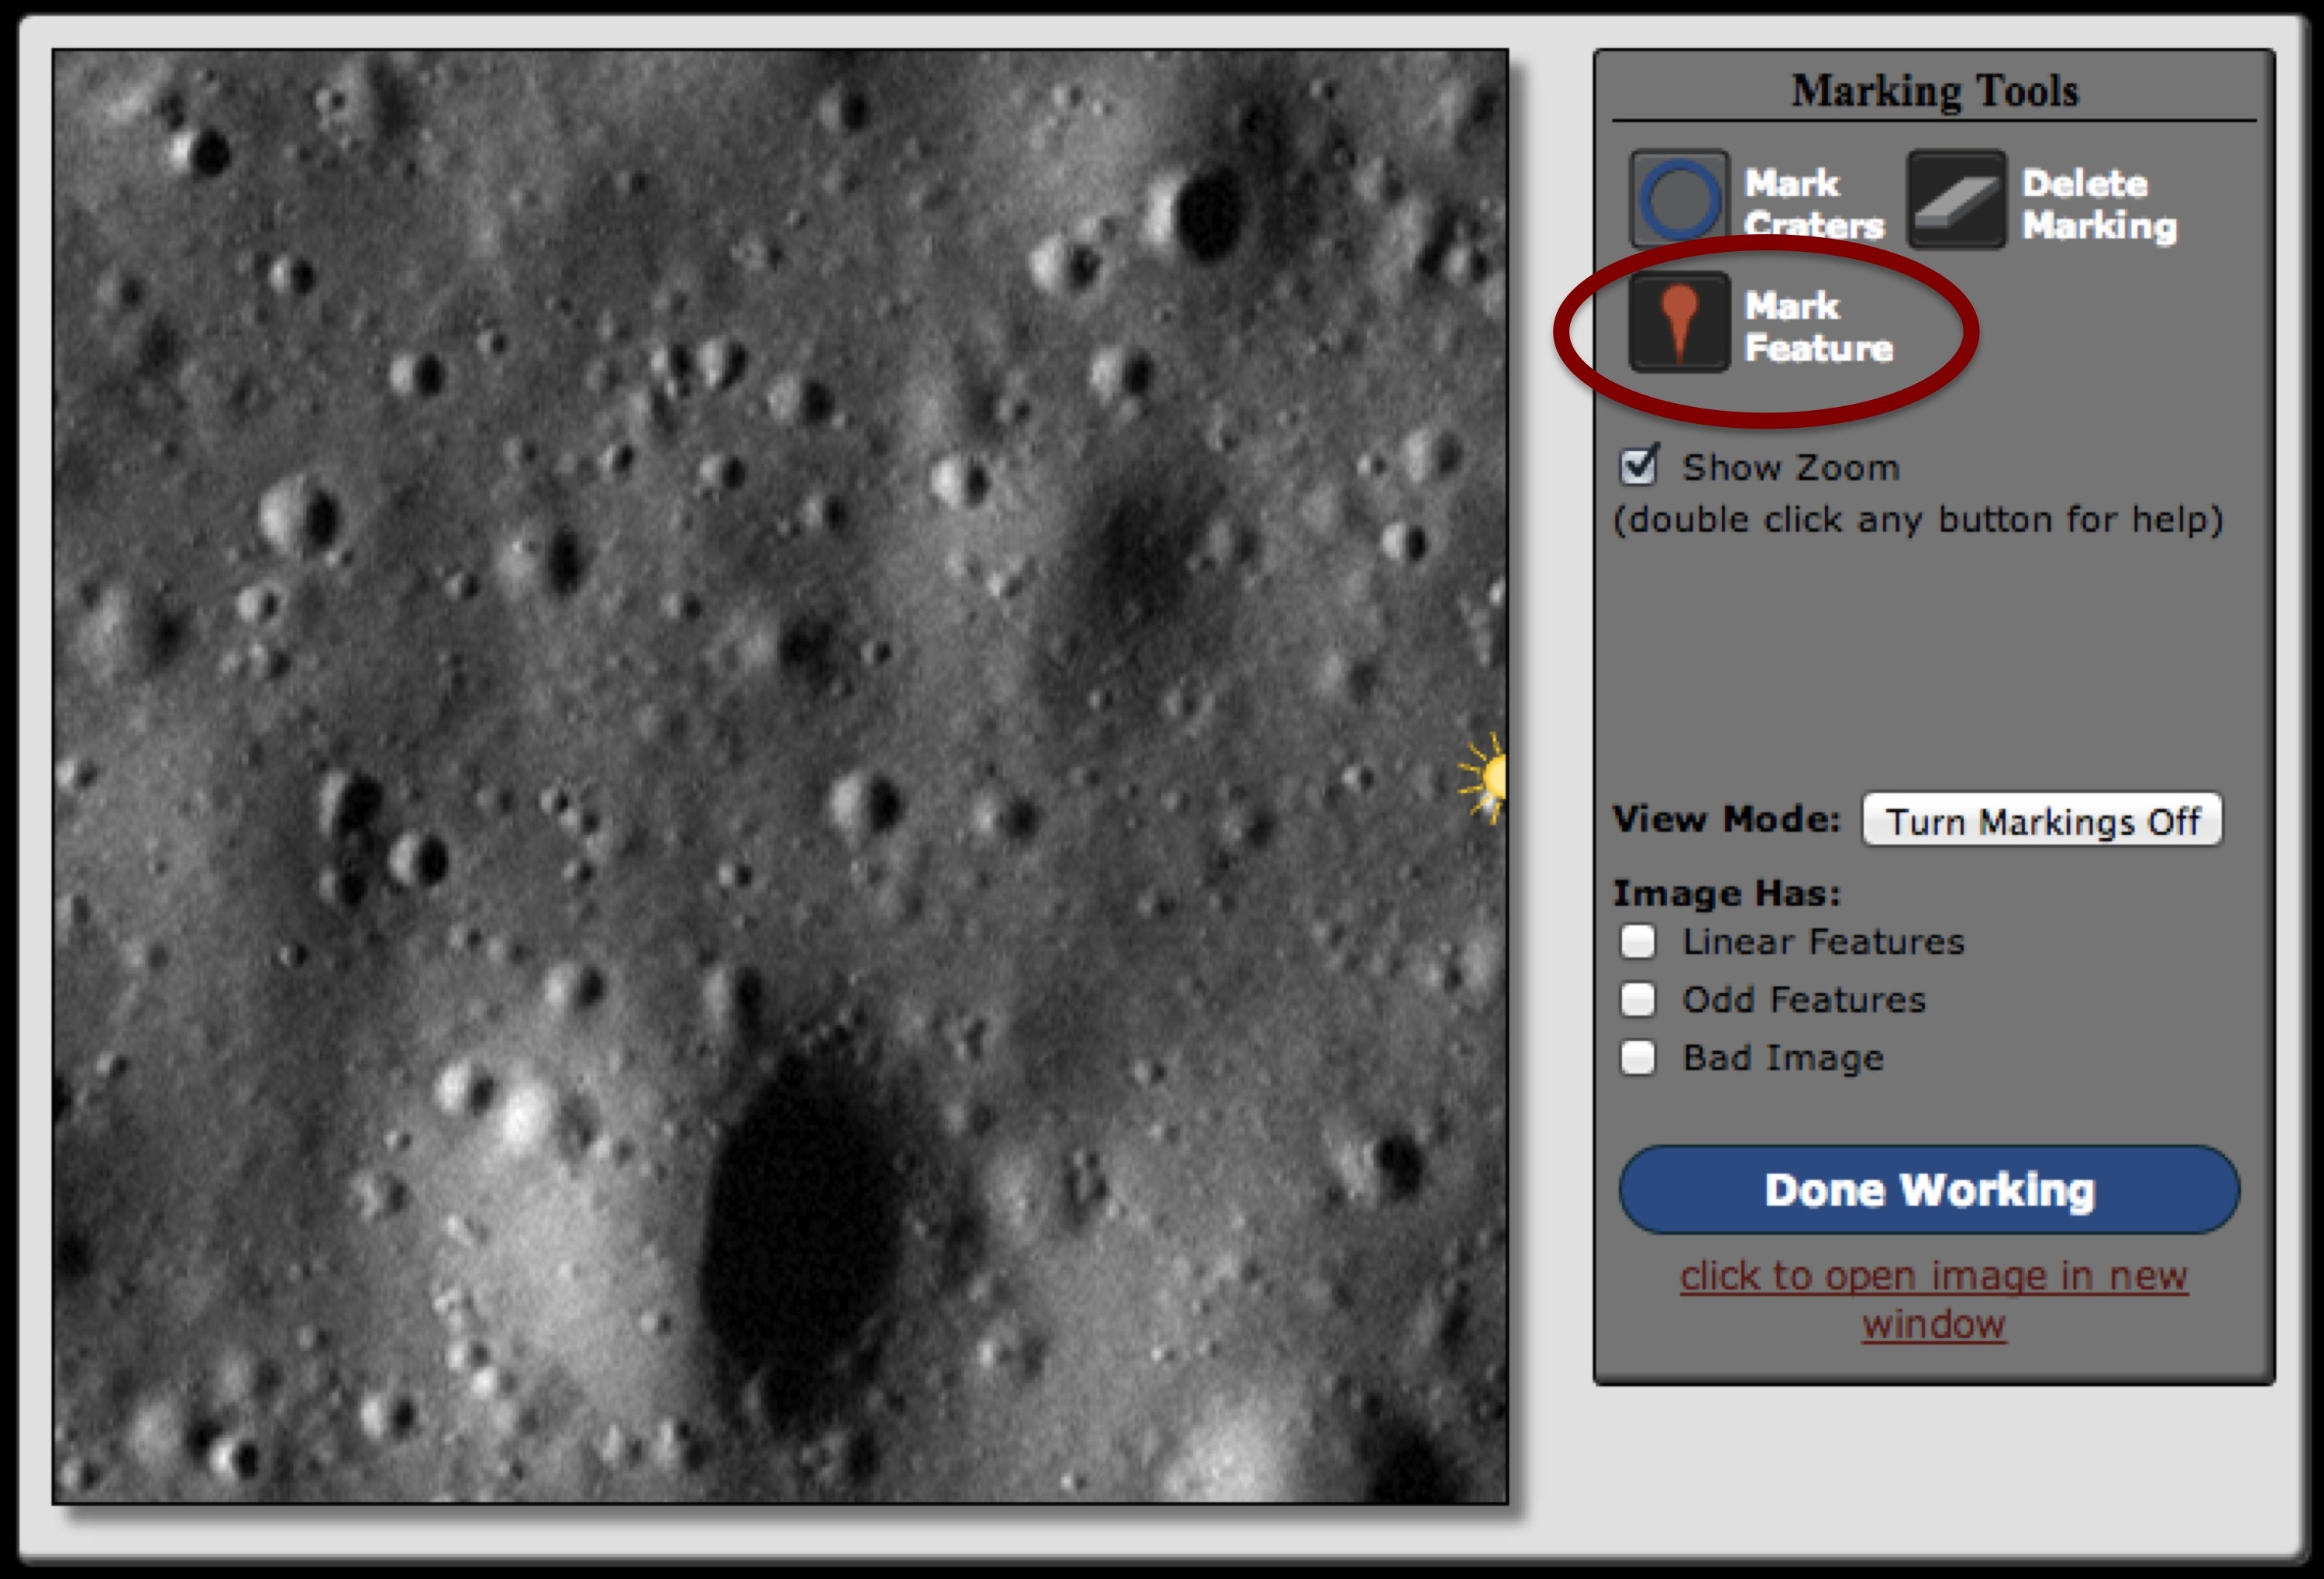
Mark Feature Button
If you want to call attention to a feature, use the marking tool in the interface to flag it (see image on the right). This will record it for the CosmoQuest Planet Mapper scientists to look at.
How do I know if I’m doing anything right? Why can’t I go back and change things?
We make it so that you can’t go back and change your markings once you’ve submitted an image – you’d be spending all your time fine-tuning past results and not moving on to new ones.
The point of crowd-sourcing like this is to have tens of thousands of people looking at everything to get a consensus result, and your marking that may have been 1 pixel off from the average isn’t going to prevent us from getting good science in the long run. In fact, the analysis of Moon Mappers results from our first year show that to be the case!
We also periodically check how every user is doing. At random intervals, a standardized image will appear for you to do. It won’t be marked in any special way, but CosmoQuest Planet Mapper scientists have already identified the craters in it. Once you’ve completed that image and submitted it, we check how you did against the experts.
When we check, we look at how well the crater centers and diameters compare. We then assign a score. We’ll show you both the score and the way the experts identified craters in that image. If the score is low, we’ll ask you to do a second standardized image – we all have bad days. If the second one is low, we’ll ask you to annotate some images where we guide you through.
I don’t see any craters, all I see are hills.
Human perception is an interesting thing and it’s a bit different for everyone. We’ve tried to rotate the images so most people will see craters, not hills. If all you see are hills, a quick way to change it is to invert your screen’s colors if you are on a Mac or Windows computer.

Image credit: NASA/GSFC/Arizona State University (I. Antonenko additional editing)
Mac: Press CTRL+OPT+CMD+8. This will invert the colors on your screen. Press the key combination again to put them back to normal. You can also go to your System Preferences, choose “Accessibility”, then “Display.” Check “Invert colors” to invert; uncheck to return to normal.
Windows XP: Go to “Help and Support.” Type in “High Contrast”. Under “Pick a Task” choose “Turn on High Contrast”. Click where it says “Accessibility Options”. Check “use high contrast and click Settings. Select the contrast scheme that inverts the colors, press “OK,” then “Apply”.
Windows Vista: Press ALT+Shift+PRNTSC (or “Prnt Scrn” or “Print Screen”). This will bring up the High Contrast window. Click “Yes”. This should invert your colors. Follow the same method to return them to normal.
Windows 7: Click on the Start menu. Type “Magnifier” in the search box. Click on the magnifier application and open it. Click on the grey gear to open the Preferences. Click the check box next to the “Turn on color inversion” to invert the colors on your screen. Follow the same steps (but uncheck the box) to return the screen to normal.
The image is cut off!
 Some of the images don’t fill the whole window, and that’s okay. You’ll see a black rectangle, triangle, or parallelogram where you’re at the end of an image. Just go ahead and mark the geologic features that are in the image, and treat the edge of the image the way you would any other that did fill the window.